Here, at CitrusDev, the mobile development team is faced with a problem working on client projects without hardware (real devices). That’s why our developers are using additional software to emulate BLE devices with nRF connect.
nRF Connect for Mobile App is suitable for testing and emulating basic BLE working flow like scanning, connection, and read/write/notify operations. The app provides GATT server initial settings, the pool of standard BLE services (Battery, Heart rate, etc), custom BLE service setup, and custom characteristics with pre-defined values. This detailed tutorial can be useful for mobile development in the field of the Internet of Things (IoT) projects. Here is the step-by-step guide – on how to create a new emulated device.
Step 1. Install the app from the Google Play – link
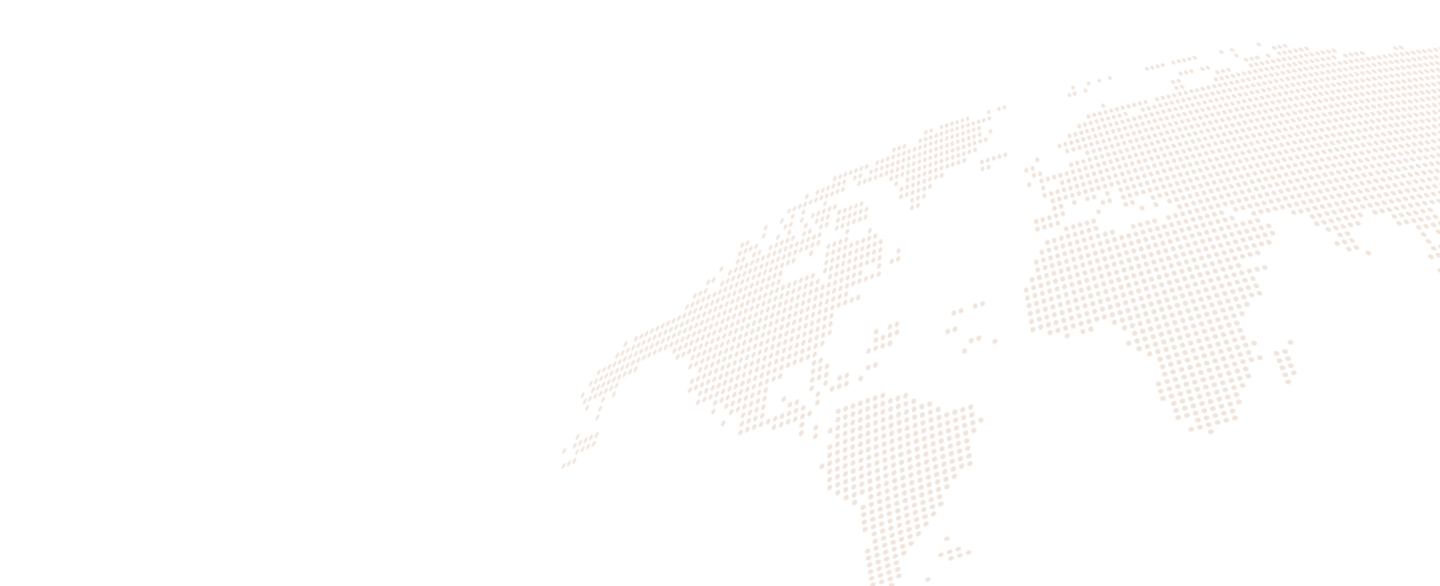
Step 2. Go to Menu (top left corner) – Configure the GATT server
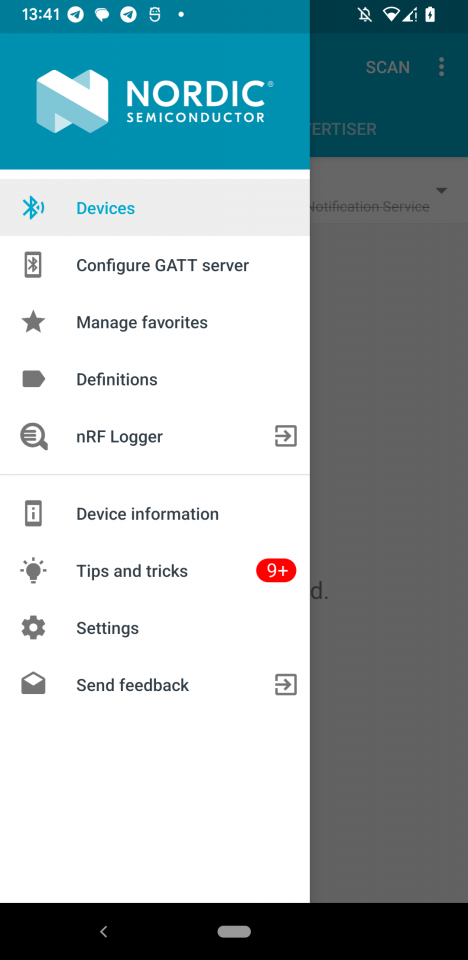
Step 3. Add a new configuration using the + icon and provide a unique configuration name
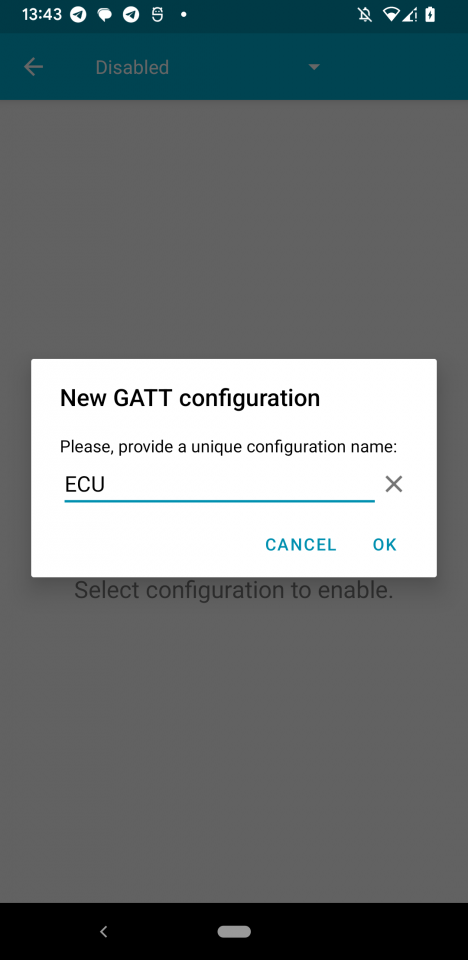
Step 4. Add service to this configuration (Custom or one standard). Define Service Name and UUID
Step 5. Add characteristics to this new service. Set properties, and initial value if needed. Add descriptor
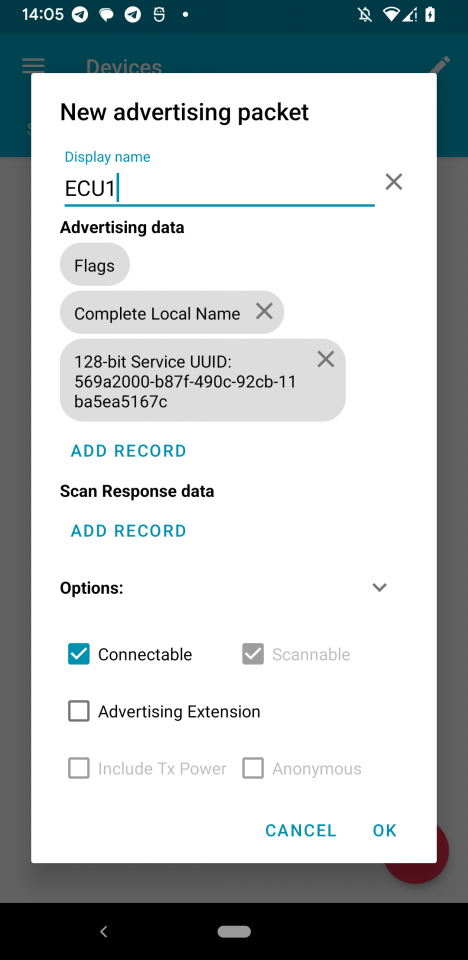
Step 6. After creating a new GATT configuration go to the Advertiser tab and create a new advertising packet template. Set name. Enable Scannable and Connectable options (for scanning/connecting tests). Add new records in Advertising data – Complete Local Name (will be visible in scan results) and Service UUID (to filter devices by this UUID)
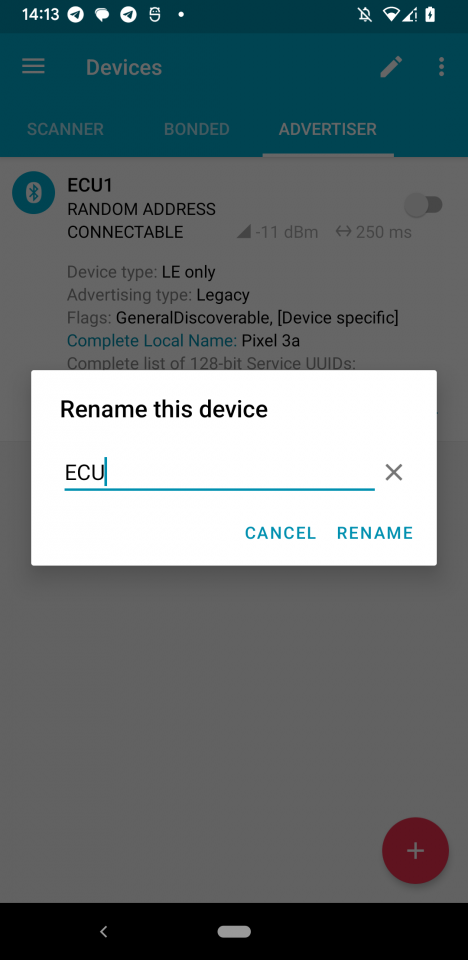
Step 7. Enable this template to start advertising. Now you can scan for BLE devices. By default, you will see your phone name so you can rename the device using the edit icon on the top
Step 8. Using a scanner on another phone you can verify your emulated device.

Feel free to contact our development team and ask any related questions. Always happy to help!
Authored by Maksym Baidala.